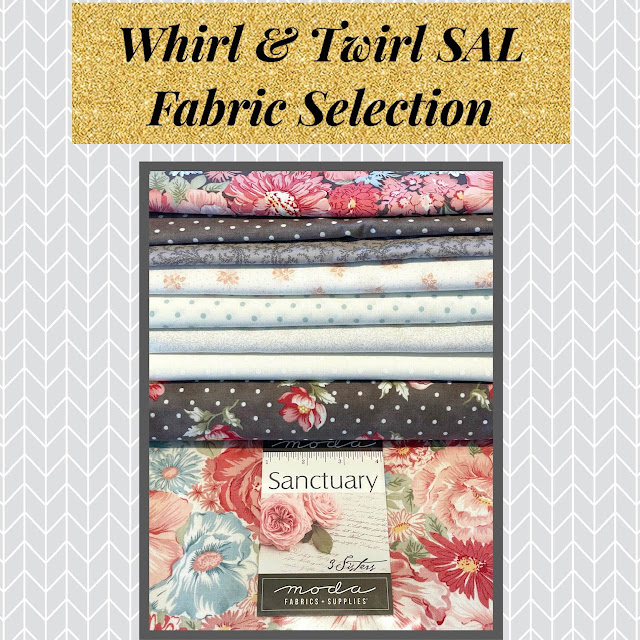
You can visit my past posts during the month of March for instructions on how to make this quilt. They will remain up for a few months but I will eventually take them down and publish the ...
read more- whirl & twirl sew along
- Page 1 of 1 ( posts )
Can you believe we have reached the end of the Whirl & Twirl Sew-Along?! Where did March go? Today we’re going to talk about finishing our quilts.
Backing
Trim the selvedge edges from the two backing rectangle pieces. Sew the two 72” x WOF backing rectangles together along the selvedge side. Backing should measure 72” x 86” (approximately). I love a scrappy back so I used my leftover layer cake squares and border strips and sewed a pieced stripe in between the backing pieces.
Quilting
Layer your quilt top, batting & backing. Quilt as desired. I machine quilt my quilts on ... read more
WooHoo! We are on the downhill slide! Today I’m sharing the instructions to assemble your quilt top. Here we go…
Step 1:Arrange four blocks into a square with the large pinwheels in the center and blades on the outside edge. Sew two blocks together to make a row, then sew two rows together to make a large block. Press seams open. Repeat for a total of 12 large blocks.This week, we will be sewing our blocks. Yay!!! But before we start with actual sewing, I thought I'd share some sewing prep information. To help organize the sewing process, I used a chart to identify the placement of the background, blade & large pinwheel fabrics to insure that:
1. Each group of four blocks had a single block using each of the four background fabrics.
2. Each group of four blades that meet to create a small pinwheel used the same fabrics for the blades.
3. Each group of large pinwheels used the same fabric for the pinwheels.
I ...
read more
Ready to sew your blocks for the Whirl & Twirl Sew-Along? Here we go!
Blade: Draw a diagonal line on the back of a 2” light fabric square (blade pinwheel). With RST, layer the 2” square on top of the end of the 2” x 9.5” dark rectangle (blade) as shown. Sew on the line, trim seam allowance to ¼” and press toward pinwheel fabric.
Large Pinwheel Shadow:Draw a diagonal line on the back of a 3.5” medium solid fabric square (large pinwheel shadow). With RST, layer the square on top of the 3.5” x 9.5 ...
read moreLayer Cake Fabric Cutting
Let's start with the layer cake! Yum, I love cake! Especially anything chocolate - and Moda! What's your favorite cake?
Separate your layer cake squares into the following:
- 12 dark-valued squares
- 12 medium-valued squares
- 2 light-valued squares. They should contrast with the background fabrics.
From each of ...
read moreToday is the day! We're kicking off the Whirl & Twirl Sew-Along with fabric selection. So hit your stash or hit the store to find your favorite layer cake and coordinating fabrics. Because I live in a rural area and I know how hard it can be to get fabric in a timely matter, I'm allowing everyone a week for this first step.
You will need:
- 1 layer cake
- 7/8 yard each of 4 low volume prints for background
- 1/2 yard medium solid (or reads as a solid) fabric for large pinwheels
- 1 yard fabric for border ...
- whirl & twirl sew along
- Page 1 of 1 ( 7 posts )